
Did you make Part 1 of Block 3? Once you've got that done, you're ready to assemble the pinwheel windmill. Sew one background rectangle to the top of each goose. Then arrange them as you see above. Sew the upper row together, then the bottom row. Finally the two halves together. You'll want to "spin" the center seam to reduce as much bulk as possible. You can find more handy pressing plans here.
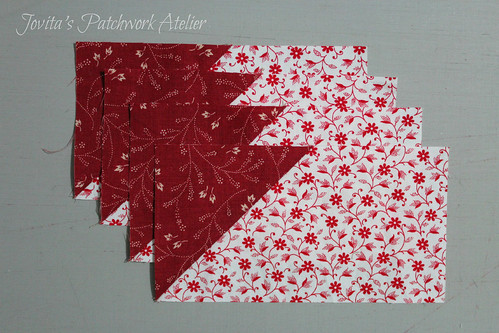
But here's the Twist .. the Spin .. that tutorial you used for no waste flying geese. It made four identical flying geese. But I just needed a little more movement in this block so ... I went back to making geese with the Quick 45° "wasteful" method (for today see block 1 but I'll add that step-by-step tutorial to Teach Me @ peawink.com soon). ~ if you'd rather use the no waste method and do four identical geese for the large star, I'm fine with that. I've given you the cutting measurements below**)
In addition to your Pinwheel Windmill block you will need:
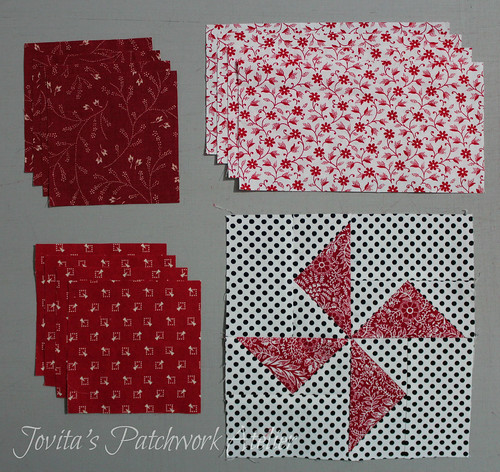 |
| * there should also be four squares of the sweet little red print in this picture * |
Background: (sweet little red print)
A FOUR 3-1/2" squares
B FOUR 3-1/2" x 6-1/2" rectangles
Star:
C FOUR 3-1/2" squares - dark red
D FOUR 3-1/2" squares - light red
Center:
E ONE 6-1/2" Pinwheel Windmill
Center:
E ONE 6-1/2" Pinwheel Windmill
** If you want to use the no-waste method for the large geese, then cut the following:
Background: (sweet little red print)
A FOUR 3-1/2" squares
B ONE x 6-1/2" square
Star:
C/D EIGHT 3-1/2" squares - any red
So, now you're basically going to construct this block the same way we did block number 2.
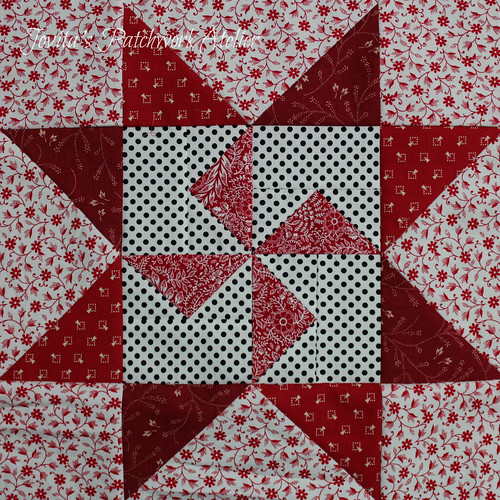 One thing that's difference is the geese ... look closely ... see? The geese have different backgrounds. Half are dark red, half are light red. The trick to this is putting all the dark red squares on the same end of the geese shapes.
Then put the light red triangles on the other end. Sorry, I really thought I had a picture of this ... but ... yeh I don't.
Do you get mad when I do this?
Should I remake & retake or are you doing ok?
Please DO LET ME KNOW?
The construction of this block is then the same as all the other blocks in the series, but if you have questions, please please don't hesitate.
Jovita,
ReplyDeleteI have just copied off block t and both parts of the block 3. I am finished with all the blocks on the fat quarter quilt-along and I wanted to add a few blocks to make it a little bigger. These blocks look like they will fit seamlessly into the overall look of the first 12. Others of yours may get more complicated, but I think I only want to add 4, or maybe eight at the most.
My colors are yellow and blues and I am very happy with how the first 12 blocks are looking.
Hope this is ok with you.
Beth beth9253@sbcglobal.net
I am following your blocks and tutorials but haven't had a chance to make any yet as I am currently working on a quilt along and starting another one. I love your blocks so I do plan to make them. Please don't get discouraged the blocks are beautiful and will make an amazing quilt and your tutorials are extremely helpful.
ReplyDeleteI just found your blog & the Morning Star, Morning Bright blocks. These are definitely going in my to-do list. Thank you for taking the time & effort to post these.
ReplyDelete