Showing posts with label FREE Pattern. Show all posts

Thursday, October 11, 2012

Charlotte's Keeping Watch

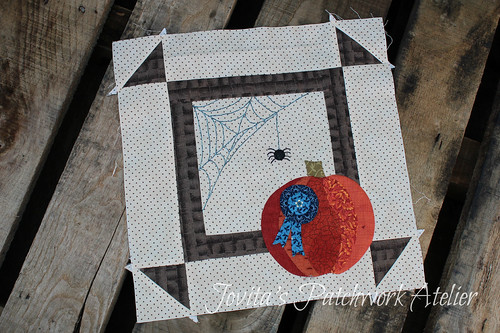
I had so much fun designing this block for Quilting Gallery's Glorious Autumn Block Party! I have lots to tell and show you too ... about my design inspiration and how I made the block. BUT I am having terrible computer problems today. Good thing Charlotte is watching out for me cuz otherwise I'd have blown a gasket by now and thrown my computer out the window.

I will be adding a complete tutorial (with pictures!) 
and more info to this page so see you again soon.

In the meantime, without further ado ... I give you

Charlotte's Keeping Watch

charlotte's web


psst ... be sure to keep reading there's a chance to win something at the end of this post!


And be sure to stop by and check out the rest of the fantastic Glorious Autumn blocks!


I will be giving away 5 kits for the appliqué / embroidery portion of my block.
 (Winners will need to supply their own background and barn door – I used cream and brown.) 

To have a chance at winning one of the kits, be sure you are a follower of my blog 
and leave a comment … telling me your favorite thing about Autumn. 

(Drawing will close October 31st at midnight ... eeeeek ... I hope you win!)

xox Jovita
Pin It Now!

Thursday, December 8, 2011

Crazy Christmas - FREE PATTERN

I can't tell you how excited I am about Christmas this year! I promise I'll share more soon but it's been busy and hectic and all for the very right reasons.

Yesterday I was teaching an ongoing Crazy Class .. Antoinette's theme is Christmas and she had a rectangular space she needed to fill. Yeh, dumb .. I didn't take pictures but I promise to next time I see her.

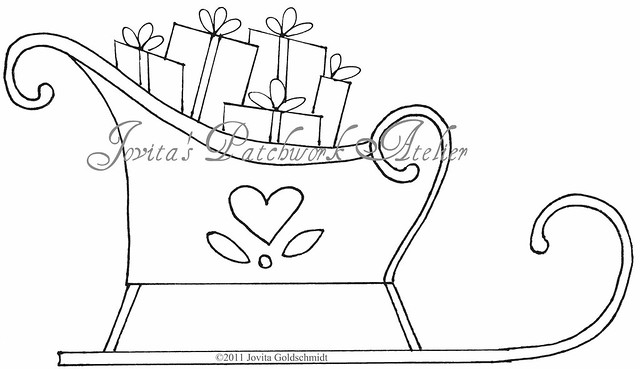
Well we looked at her quilt for awhile and then decided she needed a sleigh. So I sat down and drew one.

She was tickled, I loved the 5 minutes it took to draw and we both thought you might enjoy it too.

santa's sleigh

Antoinette plans to applique the body of the sleigh and the presents, the runners and decoration will be embroidered with 6-strand floss and the bows on the packages might be silk ribbon embroidery.  But you could do anything you want. If I had the time I was thinking simple redwork .. how about you? If you stitch it, I'd love to see it. Please email me a picture, link to your blog or post it in our Flickr group.

So this will print out at ... I don't know ... whatever size.  But you are welcome to enlarge or reduce it to fit your needs.

~ here's a very quick tip to enlarge or reduce any design ~

Measure the design you have.  Then determine the size you want.  Use the length or height ... it doesn't matter. Then take what you WANT and divide by what you HAVE. So if this sleigh currently measures 10" long and you want it to be 6" you'd divide 6 by 10 and get .60 which converts to 60%. Yep, that's the number you plug into your copy machine.  It works the same for enlarging .. you want it bigger, let's say 12". Well then 12 divided by 10 is 1.2 which converts to 120%. Voila!

So I was here and now I'm gone .. more soon. xox Jovita Pin It Now!

Monday, April 11, 2011

Everyone's a Winner!

Congratulations to Jennifer and Els ... you've both won a kit to make the easy-peasy Easter pennant.  Send me your addresses soon and I'll pop them in the mail to you!

But honestly, everyone is a winner! I thought I'd tell you all how to make this quick pin cushion.

I sewed mine by hand but if you're comfortable with a couple Y-seams it's not difficult to stitch by machine.

You'll need:

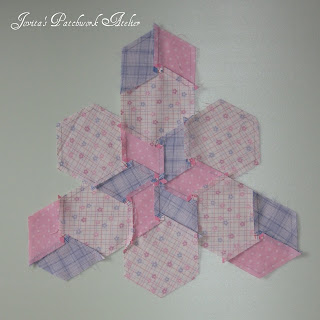
  • Twelve 60˚ diamonds
  • Six matching hexagons
  • Two cute buttons
I made mine using 2" diamonds and hexagons and it measures a whopping 7" - the advantage is that I can never lose it!

Here's a pic to show you how I pieced it together.


And another to show how I  pressed my seam allowances.


Once you have this, you'll join up the side seams and sew the star on the other side.  Leave one side seam open to fill very full with batting.  
With a button on top and one below, sew through several times and pull tight.  

Enjoy!  Jovita
p.s. if you make a pin cushion, please post a pic to JPA's Flickr group, thank you!

Pin It Now!

Thursday, April 7, 2011

Fresh Tomatoes

I can hardly wait ...

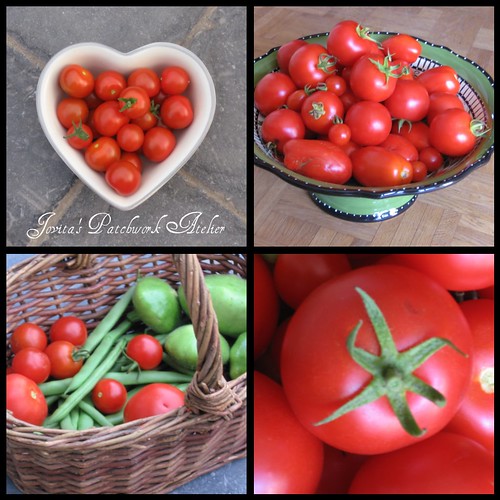
Not only will I get them from our local CSA but I have plans to plant quite a few in our garden too.  You can never have enough tomatoes in the summer.  Heaven knows store bought in or out of season never tastes the same.

I think I'm going to piece this up to hang in my kitchen!


If you'd like the pattern for my tomato, 
leave a comment (be sure your email is available)
and I'll email it to you :)

If you'd like to design your own, visit the V&A, it's very cool and I could play way too long.  But nope, I'm off to lunch then work ... today is one of those days when I absolutely LOVE my job!

This was one of my first big juicy toms from our garden in Schellebelle.

I do love my toms!!

Tom Collage Pin It Now!

Monday, March 19, 2007

Is it a Willow or a Wallow?

As promised here are more details about the new pillow I had on display for the QA show.  
I started in the middle and log-cabined outwards, but instead of working “in the round” – adding rows in a spiral – top, right, bottom, left, top, right bottom left.  I worked from side to side.  Adding left and right, then top and bottom, left and right, etc.  If I had added corner stones to each row it would have been more of a Courthouse Steps which you might want to try as well.
The top of my pillow is made entirely from our Jacquard ribbons and Westfalenstoffe, all imported from Germany.   (You’ll find a supply list below.)
The first step was to make a sandwich of muslin, batting and muslin.  This allowed me to quilt as I went, giving my pillow a nice firm feel.  All fabric strips were cut 2” wide.
I started with my initial in the middle and slid a strip under each side, pinning it so that 1/4 inch of the tan stripe was under the ribbon and 1-3/4” was still showing then top-stitched along the sides of my ribbon.
My next strip was added along the top and bottom by placing the cut strip right-sides together with the tan stripes – J – tan stripes and sewing an even 1/4” seam.  The next strips were added vertically in the same manner.  Ribbon came next, both top and bottom, so I pinned these in place, leaving 1-1/2” finished width showing from my previous horizontal row and top-stitched in place.  Then came another horizontal row tan on top   
and red/white stripes below.  These were again slid under the ribbon, leaving 1-3/4” unfinished width showing.  
After the next next vertical row of red/white stripe I got a little creative as not every row was symmetrical and the vine ribbon was mitered in the top left corner.  But this is where your imagination and individuality comes into play.  
After adding all my rows, I trimmed the top to 19” square.  I also quilted my back flaps, then added buttonholes before pinning the flaps over each other and trimming the back to 19” square.  Then I placed my top and back wrong sides together and zig-zag these layers together around the perimeter.  I was using my Featherweight and don’t have a walking foot but would recommend the use of one as my fabric want to pile up and ripple more than I would have liked.  
Rather than putting cording in my pillow I bound it.  The two layers of batting and 5 layers of fabric were thick enough that when I added a bias-cut double binding, my pillow has a weighty finish that really topped it off.  I cut my binding 2-1/2” wide and sewed it with a 3/8” seam.  My pillow form was 18” giving it a lovely filled out look.
I’m really pleased with the result and can’t wait to try more.  If you make a pillow, I’d love to see pictures.  I know some of you chose different color combinations and it will be fun to see how they all turn out.
                                                Enjoy!     Jovita
Oh – my question about it being a Willow or a Wallow?  Whenever I make a wall-hanging for a friend I aim for a standard pillow insert size . . . then add a pillow flap to the back, a hanging sleeve and I bind it as I would a quilt.  My friend then has the option of hanging her gift on the wall or using it on her sofa as a pillow.
What will you need to complete your pillow?

Pillow Front
Bullet   1 packet of Five Westfalenstoffe Fat Quarters (Red-Tan)
Bullet    Two 21” squares muslin
Bullet    One 21” square thin batting 
Bullet    Thread - I used Beige for everything so I could top-stitch without having to change.

Ribbon 
Bullet    One Alphabet
Bullet    9” Spring (Red)
Bullet    9” Poetry
Bullet    26” Vine
Bullet    16” Spring (Beige)
Bullet    18” Itsy Bitsy Vine (Tan)

Pillow Back
Bullet    Two 21” x 12” batting
Bullet    Two 21” x 24” backing fabric
Bullet    Three fun buttons
 
 
©  Jovita Goldschmidt
All images, text, and content on this site are the sole property of Jovita Goldschmidt and may not be used, copied or transmitted without her express consent.  All patterns and resulting product are for personal non-commercial use only.  You are welcome to  to link this site or a post from this site but please give appropriate credit for content. Any other inquiries please email me at jovita@peawink.com.
Pin It Now!
Related Posts Plugin for WordPress, Blogger...