Showing posts with label Tutorial. Show all posts

Wednesday, January 25, 2012

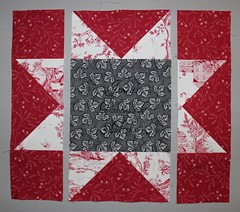
{Tutorial} Morning Star Block 1

This is a picture heavy post .. lots of pictures showing you 
how I pieced and pressed this block.
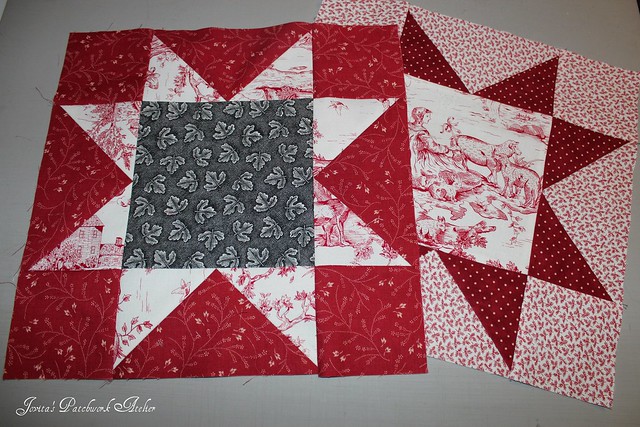
Morning Star - Block 1

I know I promised to have this to you last week but those taxes HAD to be done ... I finally finished them last night ... phase one at least. There's another filing due but I'm rewarding myself this week and do "my thing" and will take the next batch next week - fair enough right?

So here it is ... my step by step for sewing the first block of Morning Star, Morning Bright - the basic "Morning Star."

1.1 Morning Star - the piecesYou'll start with cutting all your pieces:


Background:
   A  FOUR 3-1/2" squares
   B  FOUR 3-1/2" x 6-1/2" rectangles

Star:
   C  EIGHT 3-1/2" squares

Center:
   D  ONE 6-1/2" square
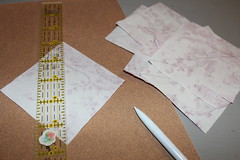

IMG_0070
On the wrong side of all C squares, draw a line diagonally from corner to corner. I use a regular sharp or mechanical pencil. One good tip is to lay the square on a piece of fine sand paper so things don't scootch around. To preserve the markings on your ruler, apply one layer of clear packing tape and then trim around the ruler. Replace as necessary.


1.2 Morning Star - "Wasteful" GeeseNow you're ready to make the flying geese units for the block - you'll need four using pieces B and C.
1.3 Morning Star - Flying Goose and "Waste"

Referring to the handout provided with the block directions (click here) you'll place one C square even with three edges of a B rectangle and sew directly on the drawn line. Press and check before trimming - be sure to allow that 1/4" seam allowance.

Your seam allowance will be pressed toward the corner of the flying goose (see illustration on the left) and if you sew those "waste" triangles together you won't lose them because we can use them later. Repeat with the opposite corner ... and you'll have a flying goose plus two "wasteful" half-square triangle units.
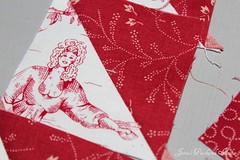
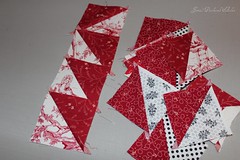
Cleavage - unplanned :)"Wasteful" Flying GeeseIf you make a bunch of blocks you can end up with a pile of half-square triangle units. Some might accidentally be even just a tad funny.

Ok, I'm getting just a tad distracted here ...

1.12 Morning Star (reverse)1.10 Morning StarOnce you have your flying geese units, you are ready to sew the block together in rows.

Press all seam allowances away from the geese.

Then you can sew those rows together into a complete block.


Wait! 
Are you wondering 
how I pressed those "they were too bulky" and now they're "funny looking" seams?

Here's a closeup. 

First I work on the back side as I open and twist the seam at the same time and press just that corner with the iron.

Morning Star - the twisted seam

I try to keep the "open" part of the seam as short as possible because I really AM . NOT . A . FAN of pressing seems open. 


Then I flip the block over and press the rest of the seam from the right side. And yes, I always press from the right side so that I am sure my seams are completely pressed to the side.
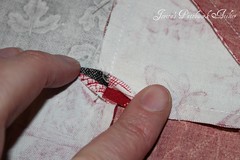
Morning Star - twisting the seamSo there you have it. A completed Morning Star block. Did I miss anything? Don't hesitate to tell me and I'll do my best to explain it further. In the meantime I'm off to get block two ready for you!

Happy sewing one and all and to all a wonderful flight! xox J
Pin It Now!

Monday, February 28, 2011

A Winner's Packet

Remember the U Pick block tutorial I wrote last week for the Moose on the Porch Layer Cake Quilt Along ... Konda picked two winners and I got to send something sweet to Grethe in Norway!

*** Keep reading cuz you could win one too! ***


What's in the package?
  • A kit to make the pin cushion you see pictured here. It's an original design by me and coordinates with my Nesting block of the month. The kit includes the wool, rick-rack, beads, buttons and silk ribbon.
  • Three skeins of hand-dyed embroidery floss also for the pin cushion.
  • A vintage-inspired packet of needles
  • A greeting card with five 9" pieces of top quality Jacquard ribbon attached, the card can be mailed to a friend or the ribbons used to adorn many projects.
I hope you enjoy it Grethe!

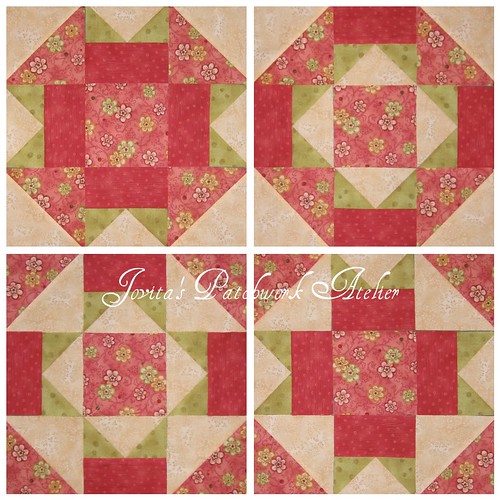
U PickBy the way, I know that some of you have sewn this block as participants in my Skills-Building block of the month (it was block 5A). I've started a Flickr group for everyone to see how many different blocks you can get from this by changing the layout or color selection. I would love for you to up-load your blocks and add them to the U-Pick Group.

But even if you haven't participated in my Skills-Building BOM, you can go download the tutorial, make a block and post it in the U-Pick Flicker Group. No fooling, on April 1st, I'll pick a random winner and you'll get a pin cushion kit too!

In the meantime, you can see all the blocks made for the Layer Cake Quilt Along here. Konda's Quilt Along is a lot of fun, you should check out all the blocks! Pin It Now!

Sunday, January 16, 2011

I Made a Mini for Me

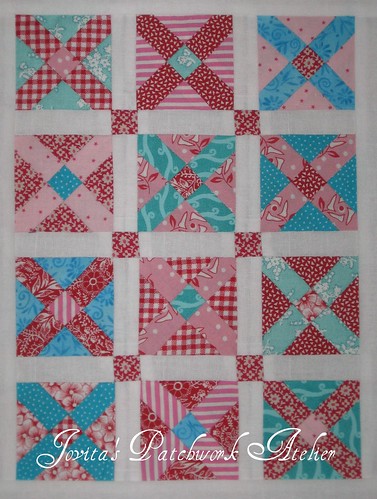
CrossroadsI spent this week tackling one bear of an unfinished project and felt like I was entitled to do something fun for myself.  I figured it'd take me a couple of days, a bit of sewing here and there.  But color me surprised ... from cutting out to the border only took me about 4 hours!

It all started while I was reviewing Quilting Gallery's 2011 list of BOMs, Quilt Alongs and Challenges which included a mini-quilt tutorial by Terrie Sandelin of Bits and Pieces.  Well, after the mini quilt swap that Liz and I just did I absolutely had to go check it out.


Civil War Crossing Quilt Tutorial
by Terrie Sandelin of Bits and Pieces
Terrie's four-part tutorial was fantastic and uses the methods in her book Miniatures in Minutes and a super simple cutting method by Anita Grossman Solomon.

Here are the steps I followed and comments where I might have done things a little different than Terrie.
  • For the twelve blocks I chose twelve, four each of three colors: Turquoise, Red and Pink
  • I followed Terrie's cutting instructions and cut twelve 4-1/4" squares (one from each fabric).  Instead of using the diagonal lines on a mat, I used a 1" wide ruler I centered it corner to corner on the square and cut along each side.

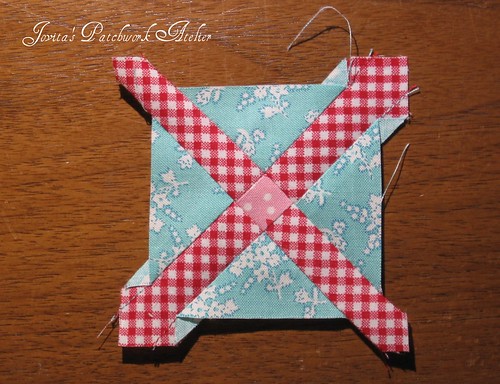
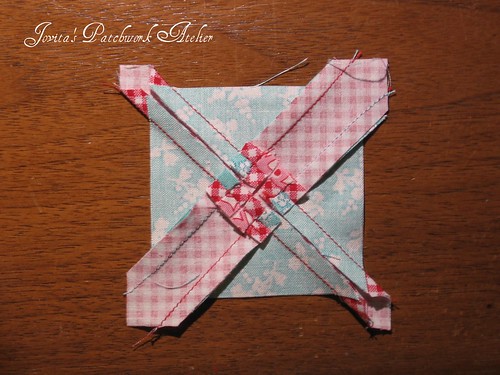
  • I did not foundation piece the blocks like Terrie did - I pieced them like any old patchwork with a scant 1/4" seam.  This did mean that all my seams were on the bias, but I sewed and pressed carefully and did not have any problems.   Here's a couple of pics of what my blocks looked like after they were sewn.
    FYI - I've added two links to tutorials for foundation piecing.
    Crossroads block before trimCrossroads block before trim (back)
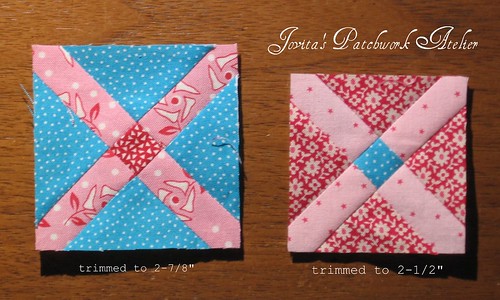
  • Crossroads blocks trimmedOnce my blocks were pieced I could have trimmed them to 2-7/8" squares so they would have finished at 2-3/8" but Terrie's finished at 2" and I wanted a small quilt so I went ahead and trimmed them down to 2-1/2" (I am going to check if 4" squares would have been big enough).


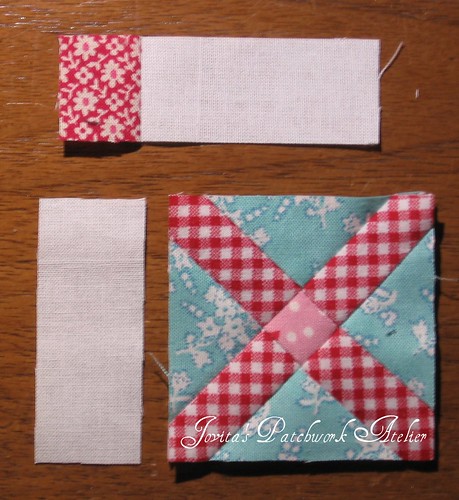
  • Adding sashing to CrossroadsTerrie and I add our sashings differently.  Regardless of whether I'm sewing a large quilt or a mini I always add my sashings to each individual block. First one side strip and then another strip that already has the cornerstone attached.
  • I left off the last row of sashing and cornerstones all the way around before adding a wide border (it doesn't show well in my pic) - the same white as my sashing.
  • I also put my side borders on before adding the top and bottom.


    Needless to say, I am totally jazzed about having a finish for me!  For now it's pinned to the wall with this other turquoise and red lovely while I decide how to quilt it. And now I can get back to work ... it looks like another busy week ahead.

    Happy stitching to you all ... and go check out Terrie's blog!  xox Jovita
  • Pin It Now!

    Sunday, August 15, 2010

    One Step Closer

    I am moving my office / sewing room / studio *again*

    I wish I could tell you it looks like this.

    But alas, I can't, and I have to tell you this lovely room belongs to Jenny B Harris and you can see more here.

    I've lost count of how many times I've done this move and am only slightly encouraged knowing that every move has meant more storage (not always a good thing) and more organization (something I always welcome).

    So today our old living room looks looks like this ... um, no ... I can't show you a pic of that.  The sofas are still here - pending the lug *upstairs* and boxes/piles look like they are going to slide everywhere.  Never mind the ladder, the tool box and vacuum cleaner.

    The best I can show you is this.  And yes, it is only the beginning of my storage wall for fabric and projects. Your seeing about 1/2 of it - when it's finished it will measure 276cm / 9ft high x 300cm / 9-3/4 ft wide. Huge!  But I can hardly wait.

    The upper portion will be covered with doors that will act as a design wall - which I would have preferred went to the floor but isn't possible due to one very helpful tail and the cheeky face that goes with it.  Plus this gives me some lower storage for things I am working on at the sewing table.  I think the one row of shelves will remain open for easy access to the Workbasket.

    So another trip to IKEA is in order to buy a few more cabinets that will go to the right of this.  Then I can start filling it will my stash so it will look something like this ...

    I fold all my fabrics around a 6" ruler, they fit on the shelf perfectly and I found a great tutorial here if you'd like to try it for yourself. Pin It Now!
    Related Posts Plugin for WordPress, Blogger...