Showing posts with label Applique. Show all posts

Wednesday, August 3, 2011

What is "Reverse" Applique?

I've had a couple of questions about what "reverse" applique means? I thought I'd see if I could come up with a simple explanation for you all.

WHAT is reverse Applique?

The term reverse applique applies when  the desired shape is cut out of the upper layer of fabric and appliqued along the inner edge of this "hole" to reveal the fabric below.


HOW IS IT DIFFERENT from "normal" Applique?

The easiest way for me to paraphrase this is ...
  • "normal" applique is stitched 
    • counter-clockwise around the 
    • outside of the shape which sits 
    • on top of the background.
  • reverse applique is stitched
    • clock-wise around the 
    • inside of the shape which sits 
    • beneath the background.
... of course this is if you are right hand-handed.
If you are left-handed ... "normal" applique is stitched clock-wise and reverse applique is stitched counter-clockwise.
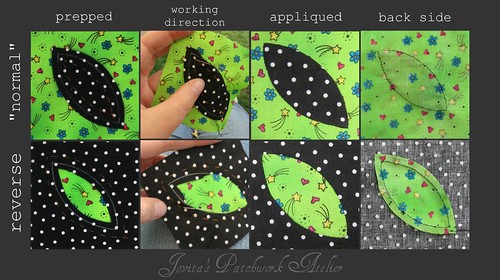
Here's a quick photo-cap:

"normal" vs. reverse applique
Down-load a printer friendly version of this picture tutorial here.

WHY do reverse Applique?

One reason for doing reverse applique instead of "normal" is that the background fabric would show through ... for example if you were appliquing a white snowman or ghost onto a darker background. You would get what is called "shadowing" or "ghosting" around the inside edge of the applique shape. So you could applique the lighter object behind (in reverse) your background.

Before I decided that my black fabric should be on top, I checked if there would be a problem.  See that black showing through in the top picture? Well that means that if I had appliqued a green melon shape on top of the black, you'd not only see a green ghost (in the seam allowance) but also the black showing through the middle.  I could have avoided the black in the middle if I cut my background out from my applique but I *almost* never do that.

Of course there are other practical, dimensional and even fun reasons for doing reverse applique.

For example when you want to add detail without adding another layer on top.  In both cases here the detail in the rose, leaves and star are created using reverse applique.

For my "boy" version of Bunnyhill Designs basket BOM, I am appliqueing a star first and then adding the elements of each month's theme on top.  The outside edge of the star is of course "normal" applique, the inside is done using reverse applique.
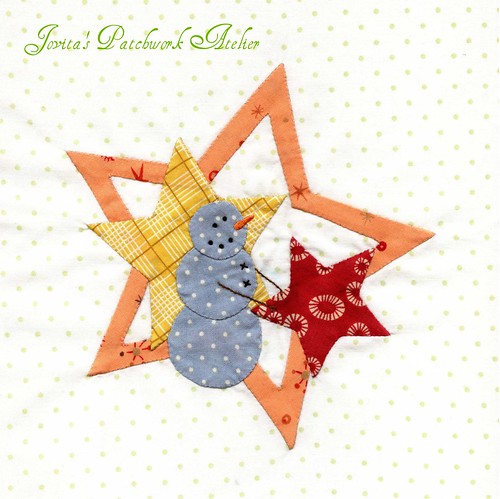
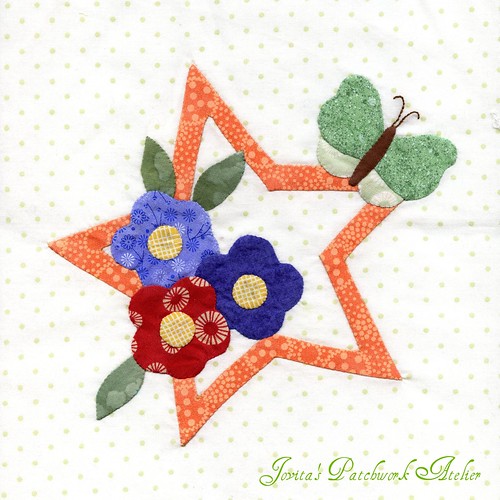
Tisket Star JANUARYBOM-5009

So, I'm sure you have more questions, so feel free to ask away and I'll do my best to answer them whether it's more about applique or anything else you're curious about.

Happy stitching!  Jovita Pin It Now!

Friday, June 24, 2011

Contagion Alert!!

I would love to call this a Friday Finish, but alas I must still quilt it ... if you know me, you'll know that can take a while, but I could not wait to share this little piece I whipped up!

Everything was all set for our Patchwork "Garden" Party last Saturday but I was itching to work on something last Friday night. The first section was nearly finished before we clocked off and went to bed.

Something bit me and it was something very contagious.

how does your inspiration grow?

It's probably the fasted start to finish I've ever done. Made especially simple by no pattern or lines to follow. The only pattern I drew carefully was the bird. All the leaves were cut and appliqued free-hand. For the dots, I used the same method as I do for "GOT DOTS."

The story of this quilt started with seeing this quilt. I was in LOVE and even pulled a stack of backgrounds from my stash to make my own. But there was no way I could justify starting another big project or even a swap. I'm happily drowning here as it is ... so many projects including GOT DOTS, Contemporary Jane, various BOMs in the shop, plus ... all.of.these.

But when inspiration and creativity strikes 
what.is.a.girl.to.do?

By the way, Nifty's was inspired by this quilt featured in this book. I don't think I dare even admit to myself that this quilt is now calling my name.  For now I think I've got a handle on this bug .. although that stack of backgrounds is still there and loudly calling my name.  When it calls too loud I tell it to hang on a minute ... this creativity is brewing and plans are starting to take shape ... later, much later.

In the meantime "Set Her Free" is really shaping up too! Tomorrow I can start adding the finishing touches and hopefully quilt her next week so I can tell Mary I mailed it on July 1st! Pin It Now!

Monday, January 31, 2011

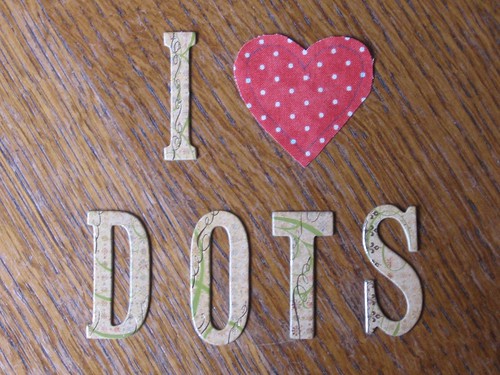
I {heart} DOTS

Got Hearts!
It's been busy, busy here this weekend with scraps of fabric flying in every direction!

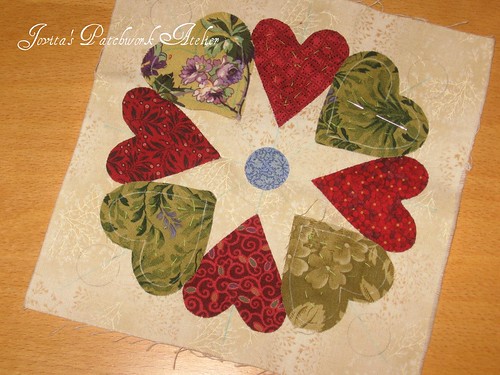
We're just about ready to roll out Part Two of the great GOT DOTS quilt along.  So I'm testing the templates now to make sure you'll like them.  I appliqued the first four larger skinnier hearts in a couple of hours this afternoon and have the very sweet little hearts basted in place for tonight's handwork.

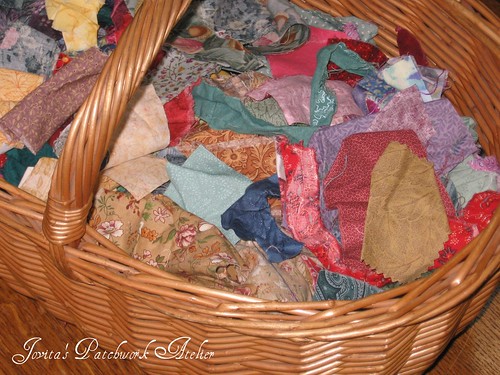
GOT DOTS scrap basket
I *nearly* showed you a pic of my living room from this weekend.  My husband was sorting through boxes of his touring info on one sofa while I had piles and box of scraps on mine.

Oh my ... it . was . a . mess!

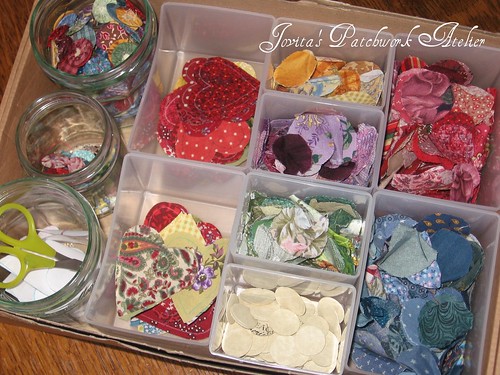
Dotty Organization :)But this is what it looked like after all that *organization* ... I think I'm set now for scraps for this quilt and will enjoy watching it grow and grow and grow.  This basket and tray sit next to the sofa now ready for evening "entertainment"

I {heart} DOTS
I think I just mocked up the label for my quilt too ... but I may write it " i {heart} dots " ... not sure yet :)

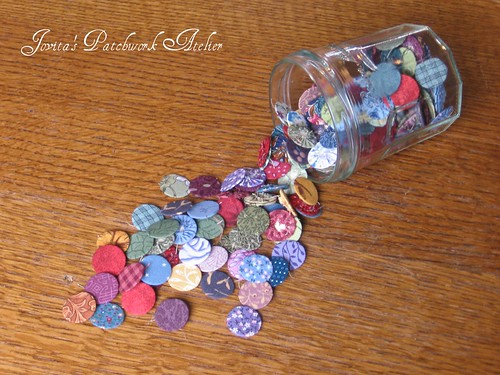
Here's a quick shot of the 170 dots I cut out and basted around cardstock in the course of two evenings.   170 sounds like a lot o' dots ... but it takes 21 for each dotty block so, um, that's a whopping 8 blocks in that little Bonne Maman jam jar.

Lots o' Dots
Pin It Now!

Wednesday, September 8, 2010

Announcing GOT DOTS and a Give-Away!

So we're ready to begin ... I've had so much fun getting this all ready to share with you!
First I'm going to blame Barb for getting me all worked up about dots, cherries and berries again ... I've always loved them and have so many quilts I would like to make that include these lovely polky dots.
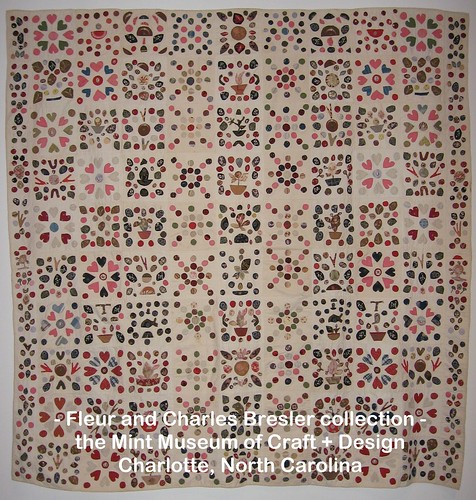
Barb's quilts reminded me of the dot quilt that has been lingering in the back of my brain ... one I had seen with my "sista," Dana, in an exhibition at the Bellevue Arts Museum.  It has such charm.  The maker was obviously using up every little scrap she had.  Well I have scraps too.  Boxes, buckets and bins of them!  So I'm all jazzed to use up a bunch of them and I'm hoping you'll join me in the fun as we venture into the great Got Dots Quilt-Along.
How does it work?  Easy, download and print out a little explanation and a few templates here.  Then dig out your scraps, start sorting and snipping.  Before you know it you'll be ready to make a bunch of these fun dotty blocks.
What do you need?  Background fabric(s) - each block is 6" finished but to allow for applique shrinkage I cut my backgrounds into 7" squares.  Each dotty block requires twenty-one 1-1/4" scraps of fabric.  That's it.  Oh yeh, you'll need needles and thread and a bit of spray starch is recommended - see Barb and Crispy's tutorials below.
Want to join us?  Please leave a comment on the blog and/or in the Flickr group - we would love to know who is going dotty with us.
Share your blocks on Flickr too!  I've already opened up a group and added pics of my blocks and some of the original quilt.  I look forward to see these dots multiply.
Want to win some dots to get you started?  
We've got lots of ways for you to enter a give-away for some great dots to get you going ... dotty ... hehe.
  1. Leave a comment here on this blog and tell us what colors you are already dreaming about.
  2. Become a follower of my blog Jovita's Patchwork Atelier
  3. Become a follower of our blog Under the Willow Tree.  By the way - there's a give-a-way going on there too ... i really really looking forward to reading your ideas :)

  4. Add a Got Dots button and link to your blog - and be sure to tell me about it.
  5. Tell us what you think of the pics we've already uploaded to the Flickr group.
Wow - that's a lotta ways to win - good luck!
    Want to share it with your friends?  No problem - point them to my blog, print out the info for them, whatever you like.  (But please remember - my "pattern" is for private use only - in all fairness, please don't sell it.  You are welcome to share it (hand it out for FREE) in your shop, guild or amongst friends but please make sure to leave my info on the copies.)  The "patterns" will be released as part one, part two ... not sure how many yet.  But it's all free, you'll just want to stay tuned to get all the parts.
    Tutorials
    • Barb's method - I do mine exactly like Barb but I have a TIP ... let the spray starch soak into the dot before you put the iron to it.  Otherwise you end up with a lot of burnt starch on your iron - trust me, I've done it too many times.
    • Crispy's method - I am very intrigued and think I might have to try this for my next project or for my own dots that I don't swap.  
    • FYI - for the great Dot Swap I think it's better if we all stick to the same method - ie. basted over cardstock.
    Feel free to give a shout out on your blog!  If you have a blog, please then grab a button below - yes I had fun making these too - there should be one to coordinate with the colors of everyone's blog - but if not, give me a holler and I'll custom make one - just because I can :)
    Linky info ...
    • Cut and paste the following HTML code into your blog or website.
    <a href="http://www.jovitaspatchwork.eu/gotdots.html/"><img src="http://www.jovitaspatchwork.eu/gotdots/gotdots_YOURCOLORCHOICE.png" alt="Jovita's Patchwork Atelier - the great Got Dot quilt-along"/></a>
    • Choose  your favorite Got Dots button.
    • Then where you see YOURCOLORCHOICE in the HTML code - change that to the button color you would like.  Change only those words, everything else should stay the same.
    • If you have any questions, please don't hesitate to contact me.
    Button choices 


    fresh2berry2choc2


    figtree2green2melon2


    redteal2rwb2teal2

      Pin It Now!

      Sunday, August 22, 2010

      Plugging Away ...

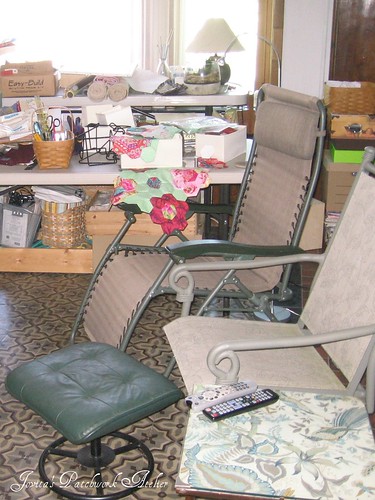
      So it's still a bit of a construction / re-organization zone around here.  The furniture "lift" came Friday night to move our two sofas upstairs via outside and through the french doors (there's no way they'd go up the staircase.   But we still need to drill holes and pull the cable wire upstairs so for now we're watching TV evenings in my studio - courtesy our garden chairs.  It doesn't feel very elegant, but by the end of the day of sorting, shifting and piling up (see those tables that still need to get sorted out!!) we're quite happy to plunk down, put feet up and just watch a bit of something funny.  

      The shop and classroom area are coming along nicely and I can hardly wait to re-open on Wednesday just to see everyone's reaction.  By the time we're finished with this re-fit we will have doubled our shelving space for bolts and added a comfortable classroom table for six with a view into our little courtyard where weather permitting we can gather to stitch on a regular basis.

      Thankfully I'm still able to carry on with hand projects in spite of this disaster zone.  My Courtyard Quilt is coming along nicely - I ended up adding 3 more fabrics to give it a bit of a lift and have pretty much decided on the layout ... it would be nice to have it done before our open house starting on the 1st of September.  

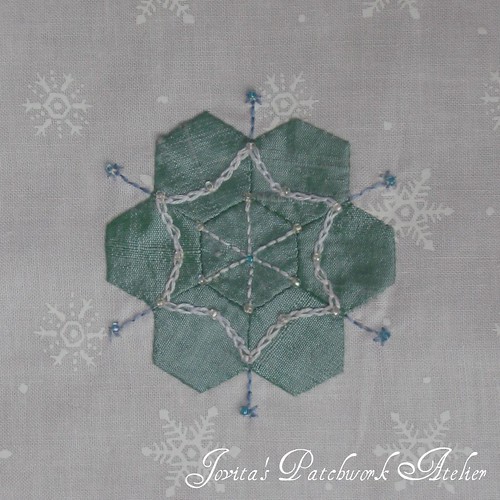
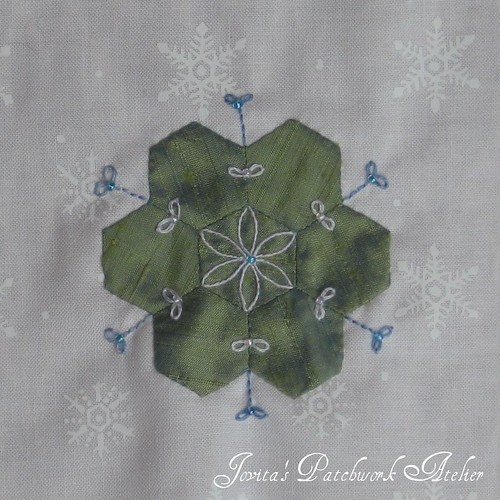
      Block three of Frosty Flakes was posted last Wednesday.  I was glad to have already prepped and appliqued the "flowers" so it was just a matter of  adding the embroidery and beads.  Voilà!  Here she is ...  Plus I've posted a pic of the first five flowers so you can see the color pallette I'm working with.  plus Dawn started a Flickr group where you can see what everyone else is doing.

      Happy Sewing!!   xox  Jovita Pin It Now!
      Wednesday, August 11, 2010

      Snowflakes

      Two posts in two days is probably not the goal I want to set for myself, but I was too excited to not share with you this sweet little project I'm working on.

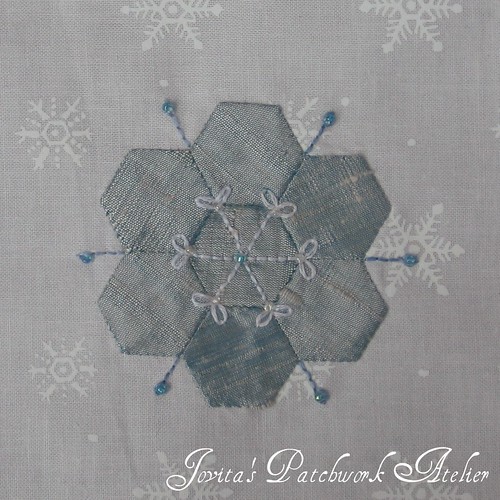
      Frosty Flakes #1As many of you know, I have a million projects and I should *really* think hard about starting another. But ... first they were snowflakes and there are only nine (9!) of them.  Then I started thinking about using silk for shimmer and well I think reason left me there.

      But it's true, they're quick and easy and a delight to make.  And something I might will definitely finish - by this Christmas.  There I posted it here, so you can hold me too it.

      The 10-week project is posted one block per week on Wednesdays by Dawn Hays of "As Sweet As Cinnamon".  It's a lovely project and easy to take anywhere or to work on while enjoying a movie/sofa night - last night I began block one and today finished two.   Think about joining us - just click on Dawn's button to the right.
      Frosty Flakes #2Project details:  silk dupioni (in 5 shades of blue/aqua), white and blue hand-dyed variegated threads from Weeks Dye Works, pre-cut 1/2" hexagons and seed beads in opalescent white and turquoise.  the background is a fabulous white-on-white snowflake print.  All product (except beads) are available at Jovita's Patchwork Atelier.

      Greetings from a summery Belgium!  
      xox Jovita
      Pin It Now!
      Thursday, August 21, 2008

      Busy – Sewing Samples for you!


      Color me Guilty!  I haven’t been updating my blog or pics of my design wall.   
      I’ve been sewing and prepping non-stop for my next trip to the States.  Here are a few pics to wet your appetite.
      Both simple patterns, but very red – these two quilts really caught my eye!  Hmmmm, maybe ideas for quick but eye-catching quilts to use up some of my stash . . . ?


      These blocks are from our new block of the month.  It’s just $60 for the whole kit using solid cottons.  
      There’s more and my suitcase is getting full – I can hardly wait to see you all!  See you in September!
      Pin It Now!
      Related Posts Plugin for WordPress, Blogger...