
 Finally ... block two! I am so sorry it has taken me months to post this. First I had to find the blocks I had already finished. I couldn't find them anywhere. How does someone lose five huge 12-1/2" blocks? I finally had to enlist my {tall} husband to help ... we spent an hour searching through my studio. When he took a break to play with the dog I grabbed a stepladder and looked on a shelf I hadn't searched yet. Yep - there they were. Pretty much his eye level but under something. Whah - I could have been sewing!
So ... to make things quick and simple I stuck with the Quick 45° Angle Method for making this block. I promise to show you another method soon but I thought this was best to get us back in the groove. A little refresher. Don't forget you'll be able to use a bunch of those leftover triangles later - I promise!
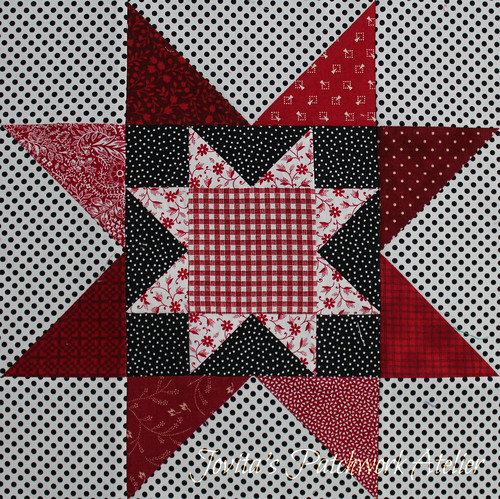
These cutting instructions make a 12" Double Morning Star block.
You'll Need:
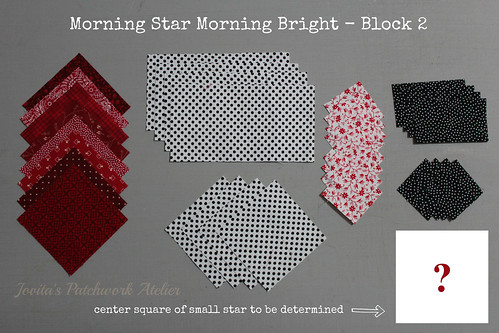
A FOUR 3-1/2" squares
B FOUR 3-1/2" x 6-1/2" rectangles
Big Star Points:
C EIGHT 3-1/2" squares
Little Star Background:
D FOUR 2" squares
E FOUR 2" x 3-1/2" rectangles
Little Star Points:
F EIGHT 2" squares
Little Star Center:
G ONE 3-1/2" square - you might want to play around and try different options.
Use pieces B & C and pieces E & F to make FOUR flying geese units using the Quick 45° Angle Method. Then you're ready to assemble your block - after you decide what to put in the middle of that little square.
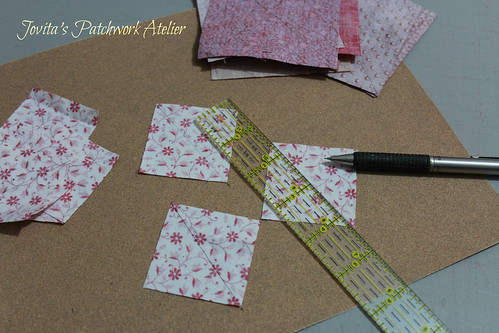
If you need a refresher for the Quick 45° Angle Method just pop back to BLOCK ONE and grab the handout. Mark a diagonal line from corner to corner on the back of each "background" square. I lay a piece of fine sandpaper on my table to keep the fabric from sliding and use a standard mechanical pencil.
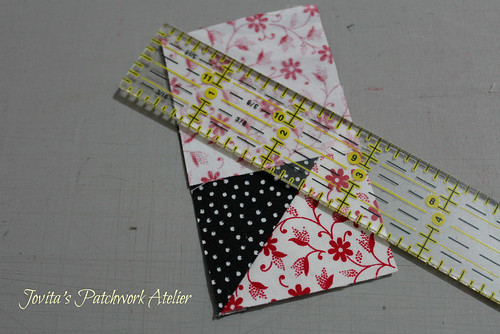
For the small flying geese (2" x 3-1/2") I trimmed my seams to 3/8" (it's marked on a standard 1x12" omnigrid ruler). A tad less bulk but ample seam allowance for these smaller units.
I have pics of the block - including how I pressed the back. I'll post them as soon as the chocolate drawing is over.
In the meantime you can piece at least the little star ... I pressed it just like Block One.
So ... Teri Leigh won the chocolate - congratulations!
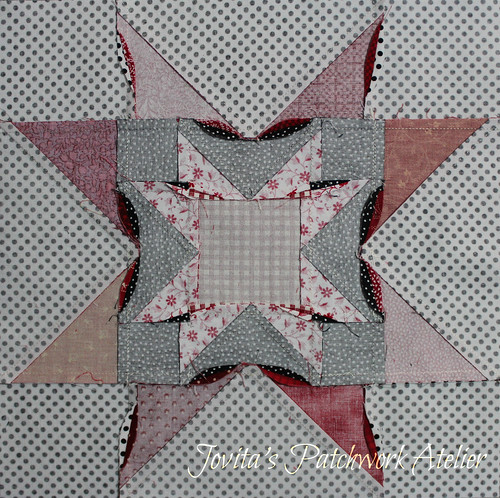
I thought I'd pop back to reveal my finished block and show you how I pressed this it ... yes, it got a little weird ... but only a tad ... you know how I don't like pressing seams open.
So I did my little twisty thing again like I did with block one. Worked like a charm. Everything is flat and smooth.
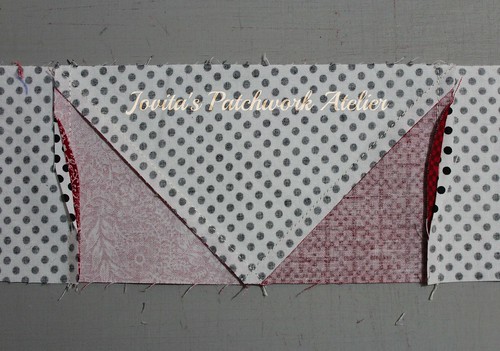
First I made the little star and pressed it just like Block One. Then I added the geese to the left and right (see below). I pressed away from the little star in at the edges but the point of the goose toward the star in the middle.
Then to add the geese I did this ... it seems weird at first but it did work. And it meant that my seams match and the points of the geese don't go all weird.
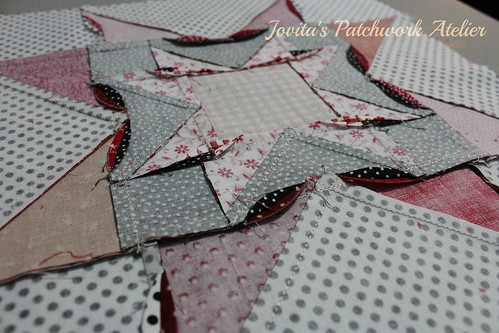
Here's a bit of an angled close up so you can see how it all worked out.
 Pin It Now!
My vote for the center is red gingham! I love to mix checks with florals with stripes, etc. Such a pretty block! But then all of your work is just scrumptious.
ReplyDelete-Letty
lettybarnes@gmail.com