
 I spent this week tackling one bear of an unfinished project and felt like I was entitled to do something fun for myself. I figured it'd take me a couple of days, a bit of sewing here and there. But color me surprised ... from cutting out to the border only took me about 4 hours!
It all started while I was reviewing Quilting Gallery's 2011 list of BOMs, Quilt Alongs and Challenges which included a mini-quilt tutorial by Terrie Sandelin of Bits and Pieces. Well, after the mini quilt swap that Liz and I just did I absolutely had to go check it out.
 |
by Terrie Sandelin of Bits and Pieces |
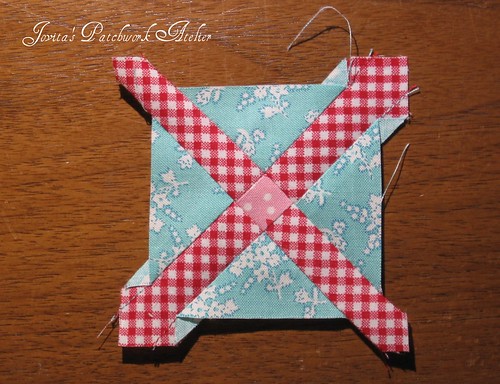
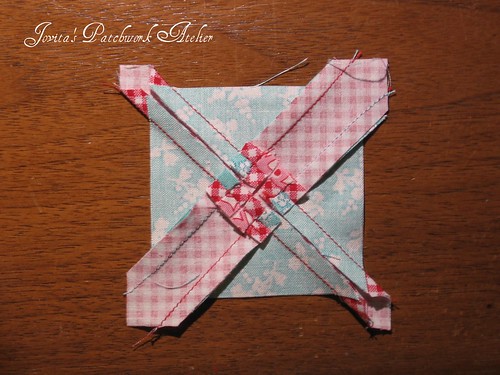
Here are the steps I followed and comments where I might have done things a little different than Terrie.
FYI - I've added two links to tutorials for foundation piecing.
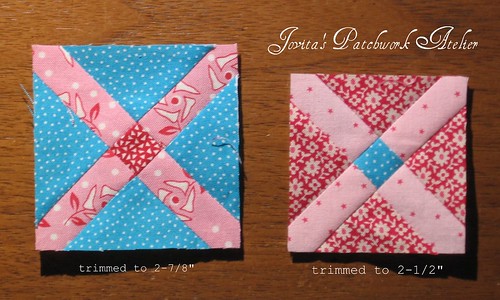 Once my blocks were pieced I could have trimmed them to 2-7/8" squares so they would have finished at 2-3/8" but Terrie's finished at 2" and I wanted a small quilt so I went ahead and trimmed them down to 2-1/2" (I am going to check if 4" squares would have been big enough).
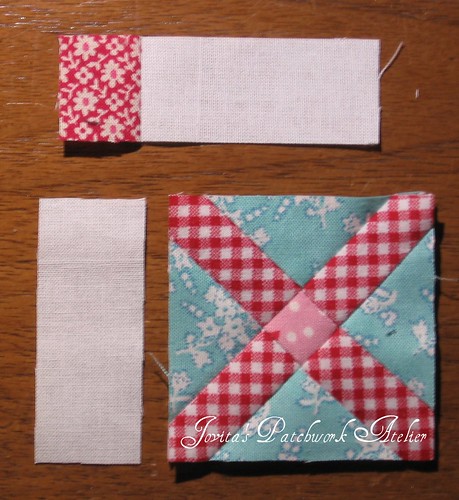 Terrie and I add our sashings differently. Regardless of whether I'm sewing a large quilt or a mini I always add my sashings to each individual block. First one side strip and then another strip that already has the cornerstone attached.
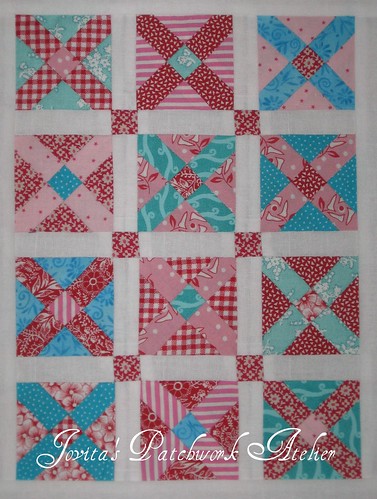
Needless to say, I am totally jazzed about having a finish for me! For now it's pinned to the wall with this other turquoise and red lovely while I decide how to quilt it. And now I can get back to work ... it looks like another busy week ahead.
Happy stitching to you all ... and go check out Terrie's blog! xox Jovita
This is absolutely darling! I love your colors! And,yes, a four inch block would work. I went to a four and a quarter to allow a little wiggle room. If I calculated correctly, a four inch block would give you the exact size on the triangles. Or at least I think that was the size that exactly fit the foundation. Aren't minis fun? So fast!!
ReplyDeleteI LOVE the colors you chose! Beautiful!
ReplyDeleteStupenda creazione!!!
ReplyDeleteLoryan
Well Jovita, this is just amazing what you created here! Love the colours, adore the style... Love, Maaike
ReplyDeleteA wonderful mini and fun fabric!
ReplyDelete